A texture thread on Facebook the other day got me thinking
abstractly about plastics. I was sharing
my ideas and experience with shrink film and also with Styrofoam. I’ve
developed techniques to use these two mediums to texture my metal clay projects.
Shrink film is a thin sheet of special plastic paper that is
typically used to make drawings that can be shrunk down with the addition of
heat. Lots of people are familiar with shrinky-dinks, which is the kid’s toy version.
Thinking outside the box, I use this kind of plastic film in my Silhouette
Cameo and shrink the texture sheets to more appropriate jewelry-proportions.
The Styrofoam that I’m familiar with using is the “bumpy”
leftovers from packaging. You know the kind - The crumbly, static-y, weightless
stuff that typically surrounds new electronics. Well, did you know that you can take
a stencil burner to it and melt patterns into it? Despite the fact that it’s
flammable, I believe it’s fairly safe to use with lower temperatures. I mean…
sculpture artists use a heated tool to cut through it all the time, so it must
be safe, right?! Anyhow… this got me thinking about recycled materials.


I started thinking about how you can use recyclable plastic
#6 to make your own shrinky-dinks. I started researching plastics.

I found out that #6 plastic is called polystyrene.
I wondered what else I could find that might shrink. I rummaged
through the recycling bin and raided my friend Roxan's pantry. I found a variety of plastics
to try and fearlessly (or stupidly?) took an embossing heat gun to them. Most
of the plastics melted into bubbly, bumpy, stinky messes. In hindsight, I
wouldn’t recommend doing this.
But, singed lungs aside, I discovered that #1 plastics can
be heated and then bent into unique shapes that would be great for custom metal
clay drying forms. #1 plastic wasn’t stinky and didn’t melt like some of the
others.

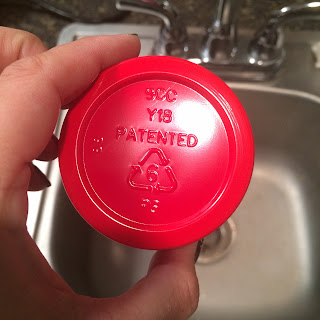
So, back to the #6 plastic. I tried shrinking down a red Solo cup, as it had the #6 on
the bottom. It shrunk, but also melted into a lumpy mess that I was starting to
become familiar with.

So, I did more research and discovered that #6 plastics come in different versions. It can be solid or foamed.


In the top near my pointer finger:
you can see that I was experimenting with pressing metal mesh into the plastics while still hot.
The cut sections were to see how internal structure holes would shrink.
(I still don't know why the Solo cup deformed so badly... my guess, based on later experience, was that it was too big of a piece of plastic and that I was unable to heat it evenly.)
So, I did more research and discovered that #6 plastics come in different versions. It can be solid or foamed.
A lightbulb went off. . . FOAMED?!
More research led to my discovery that butcher’s trays ---
yes, like the Scratchfoam that we’ve all become familiar with --- is made from
the foam version of polystyrene!
It’s a #6 plastic!
I thought, hmmm… I wonder if this type of foam will shrink
too, like the solid version of #6 plastics…? I set out to perform some more experiments.
Again I raided the house and this time I found a grey/black
butcher’s tray. It didn’t have any recycling markings. “Meh,” I thought, “that's not going to stop me.” (Apparently, I laugh in the face of danger.)
I cut some lines with my exacto knife and embossed a few
other lines with a needle tool. I used the same embossing heat tool as before.
My little sample shrunk (!!!)
The cells compressed and the material became harder!! Le
whoa.
I pressed some silly putty into it, and immediately realized
that the material had become very brittle and it promptly snapped into a couple
of pieces.


(The kind of grey/black foam I'm talking about... this is before I applied heat.)
Later research told me that grey/black foam has additives in
it, like graphite, aluminum, or carbons, which increases the material’s
insulation properties. So, for the purposes we’re after – I would not recommend
shrinking the grey/black foam.
I went searching through the trash (I’m daring, apparently) and
found a white foam plate that I’d used as a paint palette for acrylic paint. I
cut the center out of it. When I heated it, the plastic wrinkled and shunk incompletely.
I was starting to lose hope.


But then (finally?!) I went searching for the Scratchfoam in
the studio.
I cut a small piece and scored some lines with a ballpoint pen.
I applied heat with the heat gun.
YEAH! It shrinks!!!


I pressed some silly putty into it.
MEH.
MEH.
I notice that the white version is not as brittle as the
black/grey version after being shrunk. It's actually quite durable and (unlike the original version of Scratchfoam) you can't indent it with your fingernail!
Double YEAH!
...But the impression is really crappy. The ballpoint pen didn't perform very well.
...But the impression is really crappy. The ballpoint pen didn't perform very well.
Excitedly (and determined to make this work!), I performed some more experiments. After a few
tries, I begin to notice that marks made with the pen or awl come out really rough and also, the
pieces aren't shrinking very evenly.
NOTE: cutting the foam with an exacto knife seems to give the
clearest impression.


Fine marks made with an Exacto knife

NOTE: heating the foam for about 10-20 seconds makes the design “split open” but not yet shrink.

The impression from the exacto knife was much clearer.
I wanted to see what cutting negative shapes would do and I wanted to compare different mark making tools.


Control on LEFT.
On the RIGHT, I used 4 different tools to spell L-O-V-E (backwards)
(L-awl O-mechanical pencil V-ballpoint pen E-scalpel)
Also note the larger hole above the four small piercings.


The more your tool "drags", the more wrinkling you will get in your final piece.
I still think the Exacto knife creates the clearest result

NOTE: Poking holes close to each other will rip them open to
create one big hole.

Here, I've scored the sample with a scalpel

After about 10-20 seconds,
you can see the foam splitting open
where it's been scored.

The 10-20 second "split" impression

The foam likes to curl up on itself.
It's best to focus on one end and then the other while also circling the whole piece.
My method for heating is as follows:
I start by circling the heat around the piece and once the foam begins to shrink, I concentrate the heat on one side or another, going back and forth from one side to the opposite side, so that it shrinks evenly. You have to chase the piece around with the heat gun as the foam is lightweight and the air from the heat gun makes it dance. Anything used to steady the piece (awl, pliers, etc) will make a little indent in your finished piece so keep that in mind.

Here it is fully shrunk.
Note the uneven edges, I think this is a result of heating with this particular heat tool.

The shrunken impression.
I was curious to see what other tools might give the most precise lines and to see if using the oven or maybe even boiling the foam in hot water would make the foam shrink more evenly, create more even edges, or possibly reduce any fumes.
So. Another experiment...
I cut 4 pieces of Scratchfoam to 2” square each. This particular
foam came from Dick Blick.
 Each sample was marked with an X & O (from top left to top right, then to next line):
A ballpoint pen (Pilot G-2 07)
A ball stylus
A dull pencil
A sharp awl
Scored with an Exacto knife (notably this knife was well used and fairly dull...) :-/
Cut through with an Exacto knife


Sample 2 (oven) had the best results, in my opinion. Any fumes were contained. The edges were straight. The finished sample measures 1/2” x 7/8” – anyone good at math? Want to guess at the shrinkage rate? :D

A ballpoint pen (Pilot G-2 07)
A ball stylus
A dull pencil
A sharp awl
Scored with an Exacto knife (notably this knife was well used and fairly dull...) :-/
Cut through with an Exacto knife

Sample 1 was the control
Sample 2 was put in a disposable loaf pan and into a preheated oven set to “bake” for 3 minutes at 350° F
Sample 3 was also put into a disposable loaf pan (keeps the piece from flying away) and was heated with a heat tool for about 2 minutes total (note: this was a different heat tool than in my original trials – I used a Marvy Uchida model 2500 embossing heat tool which was hotter, resulting in the foam shrinking much faster)
Sample 4 was put into water brought to a boil and left for 3 minutes initially with little shrinkage and then another 5 minutes with still very little shrinkage. The Styrofoam obviously floats, so I used tongs to dunk the sample for varying periods of time.

(The back)

Boiling. Styrofoam floats... :-/

The results

(I didn't bother taking an impression of boiled sample 4)
Sample 2 (oven) had the best results, in my opinion. Any fumes were contained. The edges were straight. The finished sample measures 1/2” x 7/8” – anyone good at math? Want to guess at the shrinkage rate? :D
Sample 3 (heat tool) had good results also, and was the
fastest to shrink. Mild fumes are a consideration. The edges were wobbly. The
finished sample measures (approximately) 7/8” x 5/8”
Sample 4 (boiled water) did not shrink very much. I would
not recommend this method. Finished sample measures 2” x 1 7/8”
I'm sure now that scoring with an Exacto knife is my preferred method. The detail is still something I'm going to work on. For now, I'd recommend simpler designs if you're interested in trying this at home. Also, make sure to have a fresh (sharp) blade. Try to avoid cutting all the way through the foam, as that will rip and distort the shape (unless that's what you're going for). Try to understand that the result is fairly unpredictable and this technique tends to give a "rustic" look to your design.
I'm sure now that scoring with an Exacto knife is my preferred method. The detail is still something I'm going to work on. For now, I'd recommend simpler designs if you're interested in trying this at home. Also, make sure to have a fresh (sharp) blade. Try to avoid cutting all the way through the foam, as that will rip and distort the shape (unless that's what you're going for). Try to understand that the result is fairly unpredictable and this technique tends to give a "rustic" look to your design.
NOTE: I want to point out that Sample 2 & 3 shrunk in a curious way. One ended up longer lengthwise while the other was
longer widthwise. (Something to explore
further). I wonder if the foam cells are arranged in a certain direction. Perhaps
the sheet will always do this and there is a way to predict which side will
shrink more.
So.
You're wondering about the Silhouette, aren't you?!? :D
The Exacto being my preferred method made me think that the Silhouette would out-perform my layman's hobby knife. Plus, it's on a swivel. Can't go wrong, right?!
Um... Wrong. :((
So.
You're wondering about the Silhouette, aren't you?!? :D
The Exacto being my preferred method made me think that the Silhouette would out-perform my layman's hobby knife. Plus, it's on a swivel. Can't go wrong, right?!
Um... Wrong. :((
I put a piece of Scratchfoam in my Silhouette Cameo.
The settings were from this site, which recommended foam be cut at: blade 10, thickness 33, speed 1, and double
cut.
NOTE: This setting shredded the foam no matter how large I
printed/cut my design. It also didn’t cut all the way through the foam if that's what you're interested in (the blade isn't long enough?). I
wonder if my design was too intricate… something to play with later perhaps. You're wondering what the hell this is supposed to be, right?! It says "Anything is better than nothing" backwards. Trust me. It does. hahaha.
I have to research more about the foam cutting. I know there's a great tutorial by Miss Wanaree Tanner that I need to watch again. Maybe someone else could help me work this out?
I have to research more about the foam cutting. I know there's a great tutorial by Miss Wanaree Tanner that I need to watch again. Maybe someone else could help me work this out?

Here's what the Sil did to the plain Scratchfoam. A rightful mess, eh??
Note that the feeder rollers leave an imprint.
But, not wanting to waste the tore-up foam, I still put it in the oven (hey, it was already preheated)! I wanted to see how big of a piece I could bake in the oven. :D
One piece was fairly large (it was the 9x12 size – an entire sheet) which ended up folding over onto itself and sticking. This makes me wonder if my oven gets too hot. I'm going to experiment with the temperatures some more.
One piece was fairly large (it was the 9x12 size – an entire sheet) which ended up folding over onto itself and sticking. This makes me wonder if my oven gets too hot. I'm going to experiment with the temperatures some more.
The other piece I tried was a little bit smaller and I used
the heat gun on it. I also wanted to see how large of a piece I could shrink by
hand. This one also folded over onto itself, which I was able to gingerly pull
apart, but resulted in a disformed shape.
NOTE: I'd recommend smaller pieces to start. I haven't worked out the sizing, but in general, I'd say a few inches square, like to make your own little "stamps". This shrinking Scratchfoam might not be a good technique for larger texture sheets.
NOTE: I'd recommend smaller pieces to start. I haven't worked out the sizing, but in general, I'd say a few inches square, like to make your own little "stamps". This shrinking Scratchfoam might not be a good technique for larger texture sheets.
NOTE: The foam can be formed while still hot. You can
flatten it with a tool (or piece of cardboard to protect your hand) and you can
also EMBOSS textures into it. I experimented with a piece of wire mesh, and the
shrunken plastic took the impression fairly well.
Rubber stamps are heat-resistant... wink-wink.
Rubber stamps are heat-resistant... wink-wink.
SAFETY CONCERNS, ETC:
Here is some specific information about #6 plastics:
Polystyrene is a thermoplastic polymer.
At room temperature it’s in a solid state, but flows if
heated above 100° C (212° F), becoming rigid again once cooled.
Styrofoam is a kind of polystyrene.
Polystyrene foams are produced by introducing hydrocarbons
such as pentane, which poses a flammability hazard in newly manufactured
material.
Like all other organic compounds, polystyrene is flammable.
It’s classified as a “B3” product – meaning “highly flammable” or “easily
ignited”
Polystyrene is an organic compound and burns to give carbon
dioxide and water vapor.
Prolonged exposure to high amounts of styrene may effect the
central nervous system, causing diseases like Parkinson’s and MS.
Regarding application of heat, there is controversy about
whether microwaving takeout containers
is safe.
The styrene monomer (from which polystyrene is made) is a
cancer suspect agent. (Just to let ya’ll know.) Maybe there’s a bioengineer out
there who has more to say about the safety of this stuff??
There are efforts to reduce polystyrene in the environment,
bans on the restaurant industry and such, so perhaps eventually we won’t be
able to raid the recycling bin for shrink plastic or Scratchfoam takeout
containers.
Polystyrene will dissolve with the addition of certain
solvents… STAY TUNED… I HAVE A FEW MORE IDEAS AND EXPERIMENTS TO FOLLOW.
. . . Don't worry, I'll wear a face mask and eye goggles for those. Maybe.
. . . Don't worry, I'll wear a face mask and eye goggles for those. Maybe.
No comments:
Post a Comment